You’ve done the prep. The walls are patched, primed, and clean. The tape is on. The paint is open.
Now what?
Application is where a paint job either comes together or falls apart — and there’s more to it than loading a roller and moving it up and down the wall. The right technique for cutting in, the right nap for your wall texture, knowing when to roll and when to brush, understanding how many coats you actually need — all of it affects the final result.
After 15+ years and hundreds of Dallas homes painted, here’s everything you need to know about applying interior paint the right way.
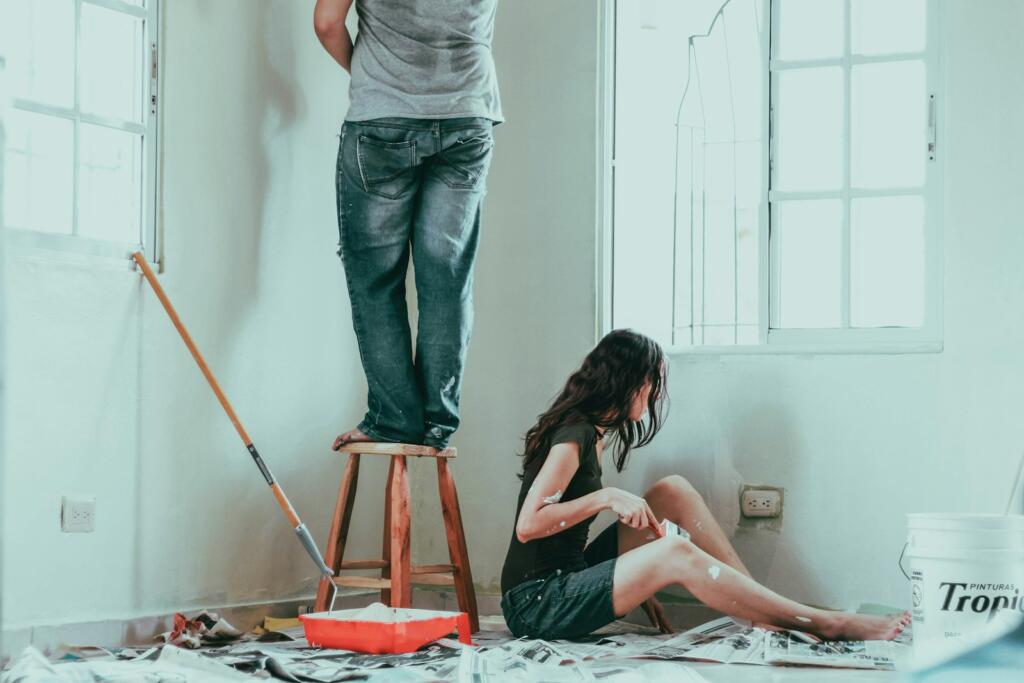
The Three Application Methods — and When Each One Is Right
Every professional painter chooses between three application methods: brush, roller, and spray. Each has a specific role, and the best results come from using all three in the right combination for the right surfaces.
Rolling
Rolling is the primary method for interior walls in occupied residential homes — and it’s the right call for most Dallas painting projects.
Why rolling works:
- Provides consistent, even coverage on flat wall surfaces
- Works exceptionally well on textured walls — the knockdown and orange peel textures common in Dallas homes built in the 1980s and 1990s accept roller paint well
- Produces a finish that’s easy to touch up later
- Requires minimal masking compared to spray
- Gives you precise control over how much paint goes on and where
When rolling is the right choice:
- Bedrooms, living rooms, hallways, and any occupied space
- Walls with texture — orange peel, knockdown, skip trowel
- Any room where masking everything for spray is impractical
- Touch-up and repair work
The limitation: Rolling is slower than spraying on large open surfaces. On a completely empty new construction home, spray is faster. In a lived-in home with furniture, belongings, and textures, rolling usually wins.
Brushing
A brush is never the primary tool for painting walls — it’s the precision tool. Every professional paint job involves a brush for cutting in at edges, corners, and trim lines, and for anywhere a roller physically can’t reach.
Where brushing belongs:
- Cutting in along ceiling lines, trim, baseboards, and door casings
- Corners where two walls meet
- Around window frames and electrical outlets
- Small detailed areas and tight spaces
- Trim, doors, and woodwork
The key to brush work that doesn’t show: Brush marks left visible in a finished wall almost always mean one of three things: the wrong brush was used, the paint was overworked, or the brushed area dried before the roller blended into it. All three are preventable.
Use a quality angled sash brush — 2″ to 2.5″ for cutting in, 3″ to 4″ for trim and doors. Cheap brushes leave visible bristle marks. A quality brush (Purdy, Wooster) holds more paint, releases it more evenly, and produces a noticeably smoother edge.
Spraying
Spray painting atomizes paint into fine particles and delivers it at high pressure, producing an exceptionally smooth, seamless finish without brush or roller texture. It’s the fastest method for covering large surfaces — and the most demanding in terms of setup.
Where spray excels:
- New construction or fully empty rooms where everything can be masked
- Cabinets and built-ins — spray produces a factory-smooth finish that rollers can’t match
- Ceilings on large, open projects
- Exterior siding on large homes
The honest tradeoff: Spray requires extensive masking of every surface, fixture, floor, and opening that shouldn’t get paint. In a lived-in home, the masking time often eliminates the speed advantage over rolling. Overspray is also a real risk — airless sprayers at high pressure can push paint through imperfect masking. For most interior wall repaints in occupied Dallas homes, rolling produces better results with less setup.
What most professional crews actually do: Spray cabinets and built-ins, roll walls, brush trim. The combination approach uses each method where it performs best.
Cutting In — The Skill That Separates Good Results from Great Ones
Cutting in is the process of applying paint along edges, corners, and trim lines with a brush before rolling the main wall surface. It’s the most technique-dependent part of any interior paint job, and it’s where most DIY results diverge from professional ones.
The Goal
A clean, straight paint line at the ceiling, trim, and corner intersections — without painter’s tape doing all the work — with a brushed margin that blends seamlessly into the rolled wall when you look at it straight on.
How to Cut In Correctly
Step 1: Load the brush properly Dip about one-third of the bristle length into the paint. Tap (don’t wipe) the brush gently against the inside of the can to remove excess. You want the brush loaded but not dripping.
Step 2: Apply away from the line first Don’t start right at the ceiling or trim edge. Begin your stroke about half an inch away from the line and stroke toward it. This gives you control and prevents flooding the edge.
Step 3: Use the tip of the brush at the line As you approach the edge, tilt the brush so the fine tips of the bristles contact the surface right at the line. Pull slowly and steadily — let the bristle tips do the work, not the ferrule.
Step 4: Keep strokes long and consistent Short, choppy strokes create visible brush marks. Long, smooth strokes that extend 8–10 inches at a time produce a cleaner edge.
Step 5: Roll immediately while cut-in is still wet This is the single most important technique tip for eliminating visible cut-in lines. The brushed area and the rolled area need to blend while both are wet. If your cut-in dries before you roll into it, the difference in texture between brush and roller will be visible, especially in raking light.
The professional approach: cut in one wall section, roll that same section immediately, move to the next. Don’t cut in the entire room and then start rolling — by the time you’re rolling the last wall, the first cut-in is dry.
Roller Technique — What Actually Produces a Smooth, Even Finish
A roller loaded and moved across a wall is not enough. Technique matters significantly.
Choosing the Right Roller Nap
Nap is the thickness of the roller cover. Nap selection is determined by wall texture — it’s not a preference, it’s a technical choice.
| Wall Surface | Nap Thickness |
|---|---|
| Smooth drywall | 3/8″ nap |
| Light orange peel texture | 3/8″ to 1/2″ nap |
| Medium knockdown or orange peel | 1/2″ nap |
| Heavy knockdown or skip trowel | 1/2″ to 3/4″ nap |
| Ceilings (smooth) | 3/8″ nap |
| Ceilings (textured) | 1/2″ to 3/4″ nap |
Using too fine a nap on a textured surface means the paint doesn’t get into the valleys of the texture — resulting in patchy, uneven coverage. Using too thick a nap on smooth walls creates excessive stipple texture in the finish.
For most Dallas homes with standard orange peel or light knockdown texture, a 3/8″ to 1/2″ nap is the right call.
Roller Quality Matters
New rollers often shed lint into the wet paint — tiny fibers that dry into the finish and require sanding out. Before first use, wrap painter’s tape around the roller cover and peel it off several times to remove loose fibers. Or roll a few strokes on cardboard to prime the cover before hitting the wall.
Use a quality roller cover — Purdy and Wooster make covers that hold more paint, release it more evenly, and produce less stipple than budget covers. The difference is visible in the finished surface.
The Rolling Pattern
Step 1: Load evenly Roll the cover into the paint tray reservoir until evenly coated. Roll it back across the ridged section of the tray to distribute paint evenly and remove excess. An overloaded roller drips and spatters. An underloaded roller drags and creates a dry, streaky application.
Step 2: Apply in a W or M pattern Start about 12 inches from a corner, roll a large W (or M) shape across a roughly 3-by-3 foot section without lifting the roller. This distributes paint across the section without streaking.
Step 3: Fill in and blend Without reloading, roll back through the W pattern to fill in the gaps and even out the coverage.
Step 4: Finish with light vertical strokes End each section with long, light strokes from top to bottom in one direction. This lays the paint film evenly and minimizes visible roller lines.
Step 5: Maintain a wet edge Always roll into the still-wet edge of the previous section before it has a chance to dry. Overlapping wet paint into wet paint blends seamlessly. Overlapping dry paint into wet paint creates lap marks.
Step 6: Work in manageable sections Don’t try to roll an entire wall in one pass without maintaining wet edges. Work in vertical sections — roughly 3 feet wide — from ceiling to floor, keeping a wet edge on each side.
The Order of Operations — What to Paint First
Sequence matters. Painting in the wrong order creates more work, not less.
The Professional Order:
1. Ceiling first Always paint the ceiling before the walls. Ceiling paint inevitably drips and splatters onto the walls — if you’ve already painted the walls, you’re touching up. Paint the ceiling, let it dry, then paint the walls.
Cut the ceiling’s edges with a brush first, then roll while your cut lines are still wet. Use a flat ceiling paint — the flat finish hides seams, patches, and roller marks that would be obvious under a shinier finish.
2. Walls second Once the ceiling is completely dry, cut in along the ceiling line, corners, and trim, then roll the walls. Work one wall at a time — cut in, immediately roll.
3. Trim, doors, and baseboards last Trim is painted last because it gets the most precise work and the highest-sheen finish. Painting trim last means the wall color is already set and you’re cutting a sharp semi-gloss trim line against a finished wall — which is much more controllable than the reverse.
Paint trim and doors in this order within the trim step: ceiling molding → door casings → window casings → doors → baseboards.
How Many Coats Do You Actually Need?
This is one of the most common questions homeowners ask — and the honest answer depends on the specific situation.
Two coats is the standard for most wall applications. One coat almost never provides fully uniform coverage. Color looks uneven, the previous color can show through in certain lighting, and the finish lacks the depth and durability of a properly built-up film.
You may need three coats when:
- Going from a very dark color to a very light one (dark navy → soft cream, for example)
- Painting over a stain or repair that wasn’t fully sealed by primer
- Using a lower-quality paint with weaker hide
- The existing surface was very porous and absorbed the first coat unevenly
You may get good results with one coat when:
- Using a premium paint-and-primer-in-one product over a previously painted surface in good condition
- Making only a minor color change between very similar shades
- Applying a full second coat wasn’t needed because coverage was complete after one — which can happen with high-pigment premium products on well-prepared surfaces
The rule of thumb we follow: Always plan for two coats. If coverage is complete after one, that’s a bonus. If you plan for one and coverage is poor, you’re making a second trip to the paint store.
Recoat Timing
Never apply a second coat before the first is fully dry. Painting over a wet or tacky first coat traps solvent, causes the film to soften, and can lead to peeling.
For most latex paints, recoat time is 2–4 hours under normal conditions. In Dallas summers with high humidity or extreme heat, allow more time — high humidity slows cure significantly. When in doubt, touch the surface lightly in an inconspicuous area. It should feel dry and not tacky before the next coat goes on.
Common Application Mistakes — and How to Avoid Them
Painting in the wrong order
Walls before ceiling means touching up the walls after ceiling drips. Always ceiling first.
Letting cut-in dry before rolling
The most common cause of visible cut-in lines. Cut in one section, roll immediately.
Overloading the roller
Excess paint drips, splatters, and creates thick ridges in the film. Load the roller evenly and roll out excess on the tray ridges before hitting the wall.
Pressing too hard on the roller
The roller does the work. Heavy pressure causes the roller to smear rather than roll, creates uneven film thickness, and leaves visible pressure marks. Use light, consistent pressure and let the loaded cover do the job.
Short, choppy roller strokes
Short strokes create visible start-and-stop lines. Long, continuous strokes — top to bottom on the final pass — produce a smooth, even finish.
Painting in extreme temperatures or humidity
Dallas summers are brutal. High humidity slows dry time, increases the chance of lap marks, and can cause fish-eye issues in the wet film. Extreme heat dries paint too fast, making it difficult to maintain a wet edge. Paint in the early morning when temperatures are lower, run the HVAC, and ensure good ventilation.
Using the wrong brush for trim
A flat brush on trim produces visible brush marks. Use a quality angled sash brush — the angled tip gives you precision control at edges and produces a much cleaner stroke.
Not removing tape at the right time
Pulling painter’s tape after the paint has fully dried tears the paint film at the edge, creating a ragged line. Pull tape while the paint is still slightly wet — at a 45-degree angle back over itself — for a clean, crisp release.
Should You DIY or Hire a Professional?
Interior painting is one of the more accessible home improvement projects for a confident DIYer. But there are situations where professional application produces results that are genuinely difficult to replicate without experience:
Consider hiring a professional when:
- You’re painting the full interior of the home — multiple rooms, ceilings, and trim
- You have high ceilings (10 feet or more) that require staging or extension equipment
- There’s significant repair work involved — texture matching, drywall repairs, wood rot
- You want spray-applied cabinets or built-ins
- You’ve tried DIY and aren’t happy with the result
- Your time is worth more than the cost difference between DIY and professional
DIY is a reasonable option when:
- You’re doing one or two rooms with standard 8-foot ceilings
- The surfaces are in good condition with minimal repairs
- You’re willing to take the time to prep properly and apply two full coats
- You understand the process well enough to avoid the common mistakes
The quality gap between a professional paint job and a careful, well-prepared DIY job is real but closeable — the difference mostly comes down to prep, the right tools, and technique, not magic.
Ready to Get It Done Right?
At East Dallas Painting, application technique is something we’ve refined across hundreds of Dallas homes. We use the right tool for every surface, apply in the correct order, and never shortcut the number of coats your walls actually need.
Call us for a free estimate: 📞 214-612-6235 | 877-275-8751 📧 info@eastdallaspainting.com
Or book online — we’ll come to you, walk the space, and tell you exactly what your project needs.
East Dallas Painting serves Dallas, Plano, Richardson, Garland, Mesquite, Rockwall, and the greater DFW Metroplex.