There’s a reason professional painters spend as much time preparing a room as they do painting it. Prep work is invisible once the job is done — but its absence shows up immediately and keeps showing up for years.
Patchy color. Peeling paint. Visible repairs ghosting through the finish. Brush marks where there shouldn’t be any. Almost every paint failure we’re called to fix traces back to something that should have happened before the first coat went on.
After 15+ years and hundreds of homes painted across Dallas and the DFW Metroplex, proper prep is the one thing we never cut corners on. This guide covers every step of interior wall preparation — what to do, why it matters, and how to tell when you’ve done it right.
Why Prep Work Makes or Breaks a Paint Job
Paint is only as good as the surface underneath it. Premium paint applied over dirty, unrepaired, or improperly primed walls will fail — sometimes within months. The same premium paint applied over a properly prepped surface can look excellent for a decade or more.
Proper wall preparation is what separates an average result from a truly professional finish. The work done before painting — often invisible to the eye — directly impacts adhesion, durability, and overall surface appearance.
Skipping prep doesn’t save time. It creates problems that cost significantly more to fix later than they would have cost to prevent.
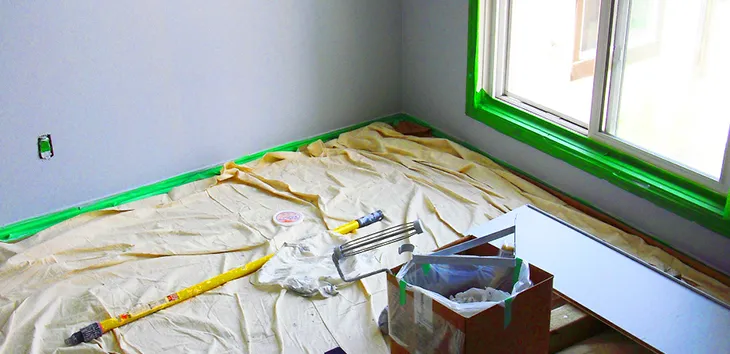
Step 1: Clear and Protect the Room
Before anything touches a wall, set up the room properly. This protects your belongings and your floors, and gives you unobstructed access to every surface.
What to do:
- Move furniture to the center of the room or out of the room entirely
- Cover remaining furniture and floors with drop cloths — canvas drop cloths are better than plastic, which is slippery and doesn’t absorb drips
- Remove switch plates, outlet covers, and light fixture covers — painting around them produces sloppy results and paint build-up on edges
- Remove curtain rods and hardware where possible
- Take down artwork, mirrors, and anything else hanging on the walls
One thing most people skip: Remove switch plates and outlet covers entirely rather than taping around them. It takes two minutes per plate and produces a cleaner result every time.
Step 2: Inspect Every Wall Thoroughly
With the room clear and in good light, walk every wall systematically and look for:
- Nail holes and screw holes
- Hairline cracks, especially near corners and around door and window frames
- Larger cracks or bulges
- Water stains or discoloration
- Peeling or flaking paint from a previous job
- Dirty or greasy areas, especially in kitchens and near light switches
- Glossy surfaces that will need scuffing or priming
- Caulk gaps along trim, baseboards, and window frames
Mark problem areas with a pencil or painter’s tape flag so nothing gets missed. In Dallas homes specifically, pay close attention to areas near windows and exterior walls — our climate puts stress on drywall through heat expansion, humidity cycles, and the occasional freeze, and cracks near these areas are extremely common.
Step 3: Repair Cracks and Holes
This is the step that makes the biggest visible difference in a finished paint job. Paint does not hide repairs — it reveals them. Any patch that isn’t done correctly will telegraph through the topcoat under certain lighting conditions.
Small Nail Holes and Shallow Dents
What to use: Lightweight spackling compound How to do it:
- Load a putty knife with a small amount of spackling
- Press it firmly into the hole, slightly overfilling
- Scrape flush with the surrounding wall in one smooth pass
- Let dry completely (lightweight spackling typically dries in 30–60 minutes)
- Sand smooth with 220-grit sandpaper
- Wipe dust clean with a damp cloth
- Spot prime before painting
Hairline Cracks
Hairline cracks — thin surface cracks that often appear near corners, above door frames, or along seams — are extremely common in Dallas homes due to foundation movement and temperature cycling.
What to use: Joint compound (not spackling — it’s too rigid and will re-crack) How to do it:
- Widen the crack slightly with a utility knife to give the compound something to grip
- Remove any loose material and dust the area clean
- Apply a thin layer of joint compound with a putty knife, pressing it firmly into the crack
- Allow to dry fully, then sand smooth
- For cracks that have re-appeared after a previous repair, apply self-adhesive mesh drywall tape over the crack before the compound — this bridges the gap and prevents it from re-cracking through the paint
Medium Holes (1–3 inches)
What to use: Self-adhesive mesh patch kit + joint compound How to do it:
- Clean around the hole and remove any loose drywall edges
- Apply the self-adhesive mesh patch centered over the hole
- Apply joint compound over the mesh with a wide putty knife, feathering the edges outward well beyond the patch
- Let dry completely — this typically takes several hours or overnight
- Sand smooth, check for low spots, apply a second thin coat if needed
- Sand again, wipe clean, spot prime
Large Holes (3+ inches)
Large holes require a proper drywall patch — cutting a clean rectangle, fitting a new piece of drywall, securing it to backing supports, taping the seams, and mudding multiple coats. This is beyond the scope of a quick prep and should be treated as a dedicated repair job with adequate drying time between coats of compound.
A note on texture matching: In Dallas homes — particularly those built in the 1980s and 1990s — walls often have a knockdown or orange peel texture. Patching over texture requires matching that texture before priming and painting, or the repair will be visible. This is a skill that takes practice. If you’re not confident in texture matching, this is a good reason to have a professional handle the repairs.
Step 4: Caulk All Gaps
Caulking is one of the most overlooked prep steps in DIY paint projects — and one of the most visible when it’s skipped. Gaps along trim, baseboards, window casings, and door frames create shadow lines and visible separations that paint won’t fill.
Where to caulk:
- Along the top edge of all baseboards where they meet the wall
- Along door and window casings where they meet the wall
- Along crown molding where it meets the wall and ceiling
- Any gap between trim elements and the wall surface
What to use: Paintable latex caulk (not silicone — silicone cannot be painted)
How to do it:
- Cut the caulk tube at a 45-degree angle, small opening
- Run a steady bead along the gap, slightly overfilling
- Smooth immediately with a wet finger or caulk tool, pressing it into the gap
- Wipe excess with a damp cloth
- Allow to dry per manufacturer instructions before painting — typically 1–2 hours for latex caulk
The result looks clean, sharp, and professional. Skipped caulking creates gaps that look unpainted and unfinished no matter how good the wall color is.
Step 5: Clean the Walls
Even walls that look clean are often coated with a film of dust, airborne grease, smoke residue, or household grime that will prevent paint from bonding properly. Walls must be thoroughly cleaned before any painting begins. Even when surfaces appear visually clean, they often retain invisible contaminants such as dust, grease, smoke residues, or airborne particles that can interfere with paint bonding.
For most interior walls: Wash with warm water and a sponge or microfiber cloth. Work from top to bottom to avoid dripping dirty water over already-cleaned areas. Allow to dry completely before painting.
For kitchens and areas near the stove: Use a solution of warm water and a grease-cutting dish soap, or a TSP (trisodium phosphate) substitute cleaner. Grease aerosolizes during cooking and coats walls, cabinets, and ceilings within an 8-foot radius of the stove. It’s invisible but creates a serious adhesion barrier. Always follow the degreaser wash with a clean water rinse to remove any residue.
For walls with mildew: Use a diluted bleach solution (one part bleach, three parts water) to kill mildew before washing. Never paint over active mildew — the mildew will grow through the paint within weeks.
For glossy painted surfaces: Glossy paint repels new paint. Either sand the surface with 150-grit sandpaper to dull the sheen, or apply a bonding primer. Painting over gloss without this step is one of the most common causes of adhesion failure in repaint projects.
Step 6: Sand Where Needed
Sanding isn’t always necessary, but in several situations it makes a meaningful difference in the final result:
Sand when:
- The existing paint has drips, runs, or heavy texture from a previous brush or roller application
- There are visible brush marks or roller stipple in the existing finish you want to smooth out
- The surface has a glossy finish (sand to dull it)
- Repairs have dried and need to be blended smooth into the surrounding wall
- There are rough patches or raised areas anywhere on the wall
What to use:
- 150-grit sandpaper for dulling gloss or smoothing heavier texture
- 220-grit for final smoothing of repairs and light surface prep
Always wipe or vacuum sanding dust thoroughly before priming or painting. Dust sitting on the surface will be sealed under your primer and topcoat, creating a gritty texture in the finished surface.
Step 7: Apply Primer Where Needed
Not every repaint situation requires full-wall priming — but primer is non-negotiable in specific situations. Applying the wrong primer (or skipping it when it’s needed) is one of the most common causes of paint failure.
Always prime:
- New drywall — bare drywall is highly porous and will absorb paint unevenly without primer, creating a blotchy, patchy result. Use a dedicated drywall primer.
- All repaired and patched areas — spot prime every patch, even small nail holes. Unprimed patches absorb topcoat at a different rate than the surrounding painted wall, creating visible flashing.
- Stained surfaces — water stains, smoke, nicotine, crayon, and marker require a stain-blocking primer (shellac-based like Zinsser BIN for severe stains, water-based stain blocker for lighter stains). Regular paint over stains will never fully cover them.
- Dramatic color changes — going from dark to light or light to dark without primer means using significantly more topcoat than necessary. A tinted primer matched to your new color saves paint and produces better coverage.
- Previously glossy surfaces — bonding primer bridges the adhesion gap between the slick existing surface and the new paint.
- Any surface with an unknown paint history — if you don’t know what’s on the wall, priming is the safe choice.
When you can skip full-wall primer: Previously painted walls in good condition, similar color, no stains, clean and properly prepped — a quality topcoat applied in two coats will perform well without a full prime coat. Spot-prime any patches and proceed.
Step 8: Protect Trim, Ceilings, and Adjacent Surfaces
Before the first drop of paint opens, everything that shouldn’t get painted needs to be protected.
Painter’s tape: Apply painter’s tape along the edge of trim, window frames, door casings, and ceiling lines where they meet the wall. Press the tape edge firmly with a putty knife or your fingernail to prevent paint from bleeding underneath.
Important: Remove painter’s tape while the paint is still slightly wet — not after it’s fully dried. Dried paint forms a film over the tape edge, and pulling dry tape tears the film and creates a ragged edge. Pull at a 45-degree angle back over itself for the cleanest release.
For ceilings: If you’re not painting the ceiling and want a crisp wall-to-ceiling line, tape the ceiling edge. If you are painting both ceiling and walls, paint the ceiling first, then cut in the walls second — it’s much easier to cut a wall color against a painted ceiling than to cut a ceiling against an unpainted wall.
How Professional Prep Differs from DIY Prep
The fundamentals are the same, but there are a few things professional painters do that most DIYers don’t:
We repair before we quote the final scope. Walking every wall before pricing means nothing gets missed. Hidden repairs that surface mid-job cause delays and cost overruns.
We let repairs dry fully. Joint compound and spackling shrink slightly as they cure. Painting over compound that isn’t fully dry causes the repair to continue shrinking under the topcoat, creating a visible depression. We allow full cure time — sometimes overnight for thicker applications — before priming.
We prime all patches without exception. Every repaired area, no matter how small, gets spot primed. Unprimed patches cause flashing — a visible difference in sheen between the patch and the surrounding wall — that shows up even when the color matches perfectly.
We check lighting before calling prep complete. Raking a work light at a low angle across the wall surface reveals imperfections that are invisible under normal room lighting. This is the final check before primer goes on.
The Prep Checklist
Before opening a single can of paint, run through this list:
- Room cleared and floors covered with drop cloths
- Switch plates and outlet covers removed
- All walls inspected for holes, cracks, stains, and gloss surfaces
- All nail holes, cracks, and damage repaired
- Repairs fully dry and sanded smooth
- All gaps at trim and baseboards caulked
- Walls washed clean (degreased in kitchen areas)
- Glossy surfaces sanded or primed
- All repaired areas spot-primed
- Full primer coat applied where needed (new drywall, stains, dramatic color changes)
- Primer fully dry
- Painter’s tape applied along all trim, ceilings, and adjacent surfaces
- Ready to paint
When Prep Work Reveals Bigger Problems
Sometimes wall prep uncovers something more significant than a nail hole or surface crack. Signs to watch for during inspection:
- Recurring cracks near the same location — especially diagonal cracks near door or window corners in Dallas homes — can indicate foundation movement. These should be evaluated before painting, as the cracks will return regardless of how well they’re patched if the underlying movement continues.
- Soft or spongy drywall — pressing on a wall section that gives or feels soft indicates moisture damage behind the surface. Painting over it will fail quickly and the underlying problem will worsen.
- Brown or yellow staining in repeating patterns — often indicates an ongoing slow leak from plumbing or roof that needs to be fixed before the area is painted.
- Mold or mildew behind peeling paint — requires remediation, not just prep and repaint.
In these situations, the right call is to address the underlying issue before investing in a paint job. At East Dallas Painting, if we find something during our walkthrough that needs attention before painting, we’ll tell you directly rather than paint over it and let it become your problem later.
Leave the Prep to the Professionals
Proper interior prep work takes time, skill, and the right materials. A professional crew that prepares surfaces correctly will consistently outperform a rushed DIY prep — not because the paint is different, but because the foundation it goes on is.
If you’re planning an interior paint project in Dallas, we’d be glad to walk through your home, identify what prep your specific surfaces need, and give you an honest estimate on what it will take to get it done right.
Call us today for a free estimate: 📞 214-612-6235 | 877-275-8751 📧 info@eastdallaspainting.com
Or book directly online — we’ll come to you, assess your walls, and tell you exactly what needs to happen before the first coat goes on.
East Dallas Painting serves Dallas, Plano, Richardson, Garland, Mesquite, Rockwall, and the greater DFW Metroplex.